
Fitbit Integration
Use Point SDK to allow your users to integrate their Point and Fitbit accounts.
Overview
When you integrate your app with Fitbit, Point Health Service will subscribe to Fitbit to collect the end-user data and generate metrics. However, we must provide a way for the user to authenticate their account and give Point authorization to subscribe to Fitbit data.
This article will cover all steps necessary to provide full Fitbit integration to your Point-powered application.
Integrate your app with Fitbit.
Create a custom URL for your app in Xcode.
Set up the SDK with your Fitbit Client ID.
Call the Fitbit authentication method.
💡 As this integration is mostly done in Point's backend, it is available regardless of device type.
Fitbit Integration
The first step to using Fitbit within Point SDK is integrating your app with Fitbit. We have a step-by-step tutorial here.
⚠️ You also must have a user token set to handle your user's Fitbit authentication. Check Getting Started for more information.
Authentication
Each user will need to individually authenticate their Fitbit account within Point SDK and give Point permission to get their Fitbit data. This is done on a Fitbit's web page, although the SDK is capable of loading a browser session that displays the authentication page. After some simple project setup, all you will need to do is call an SDK method when you wish to trigger the authentication flow.
Create a custom URL
As the authentication is handled by a browser session, the browser must know how to handle the control back to your app. For this, we can use a custom URL scheme that, when called by the browser, redirects to your app and dismisses the browser.
- Go to your project settings and select your app target.
- Under the
Infotab, look for URL Types and click "+" to add a new one. - In the Identifier field, enter your app's Bundle ID.
- In the URL Schemes field, enter the scheme you used in the
callbackURLwhen creating your app integration with Fitbit. For example, if yourcallbackURLis "https://exampleApp/auth", use "exampleApp".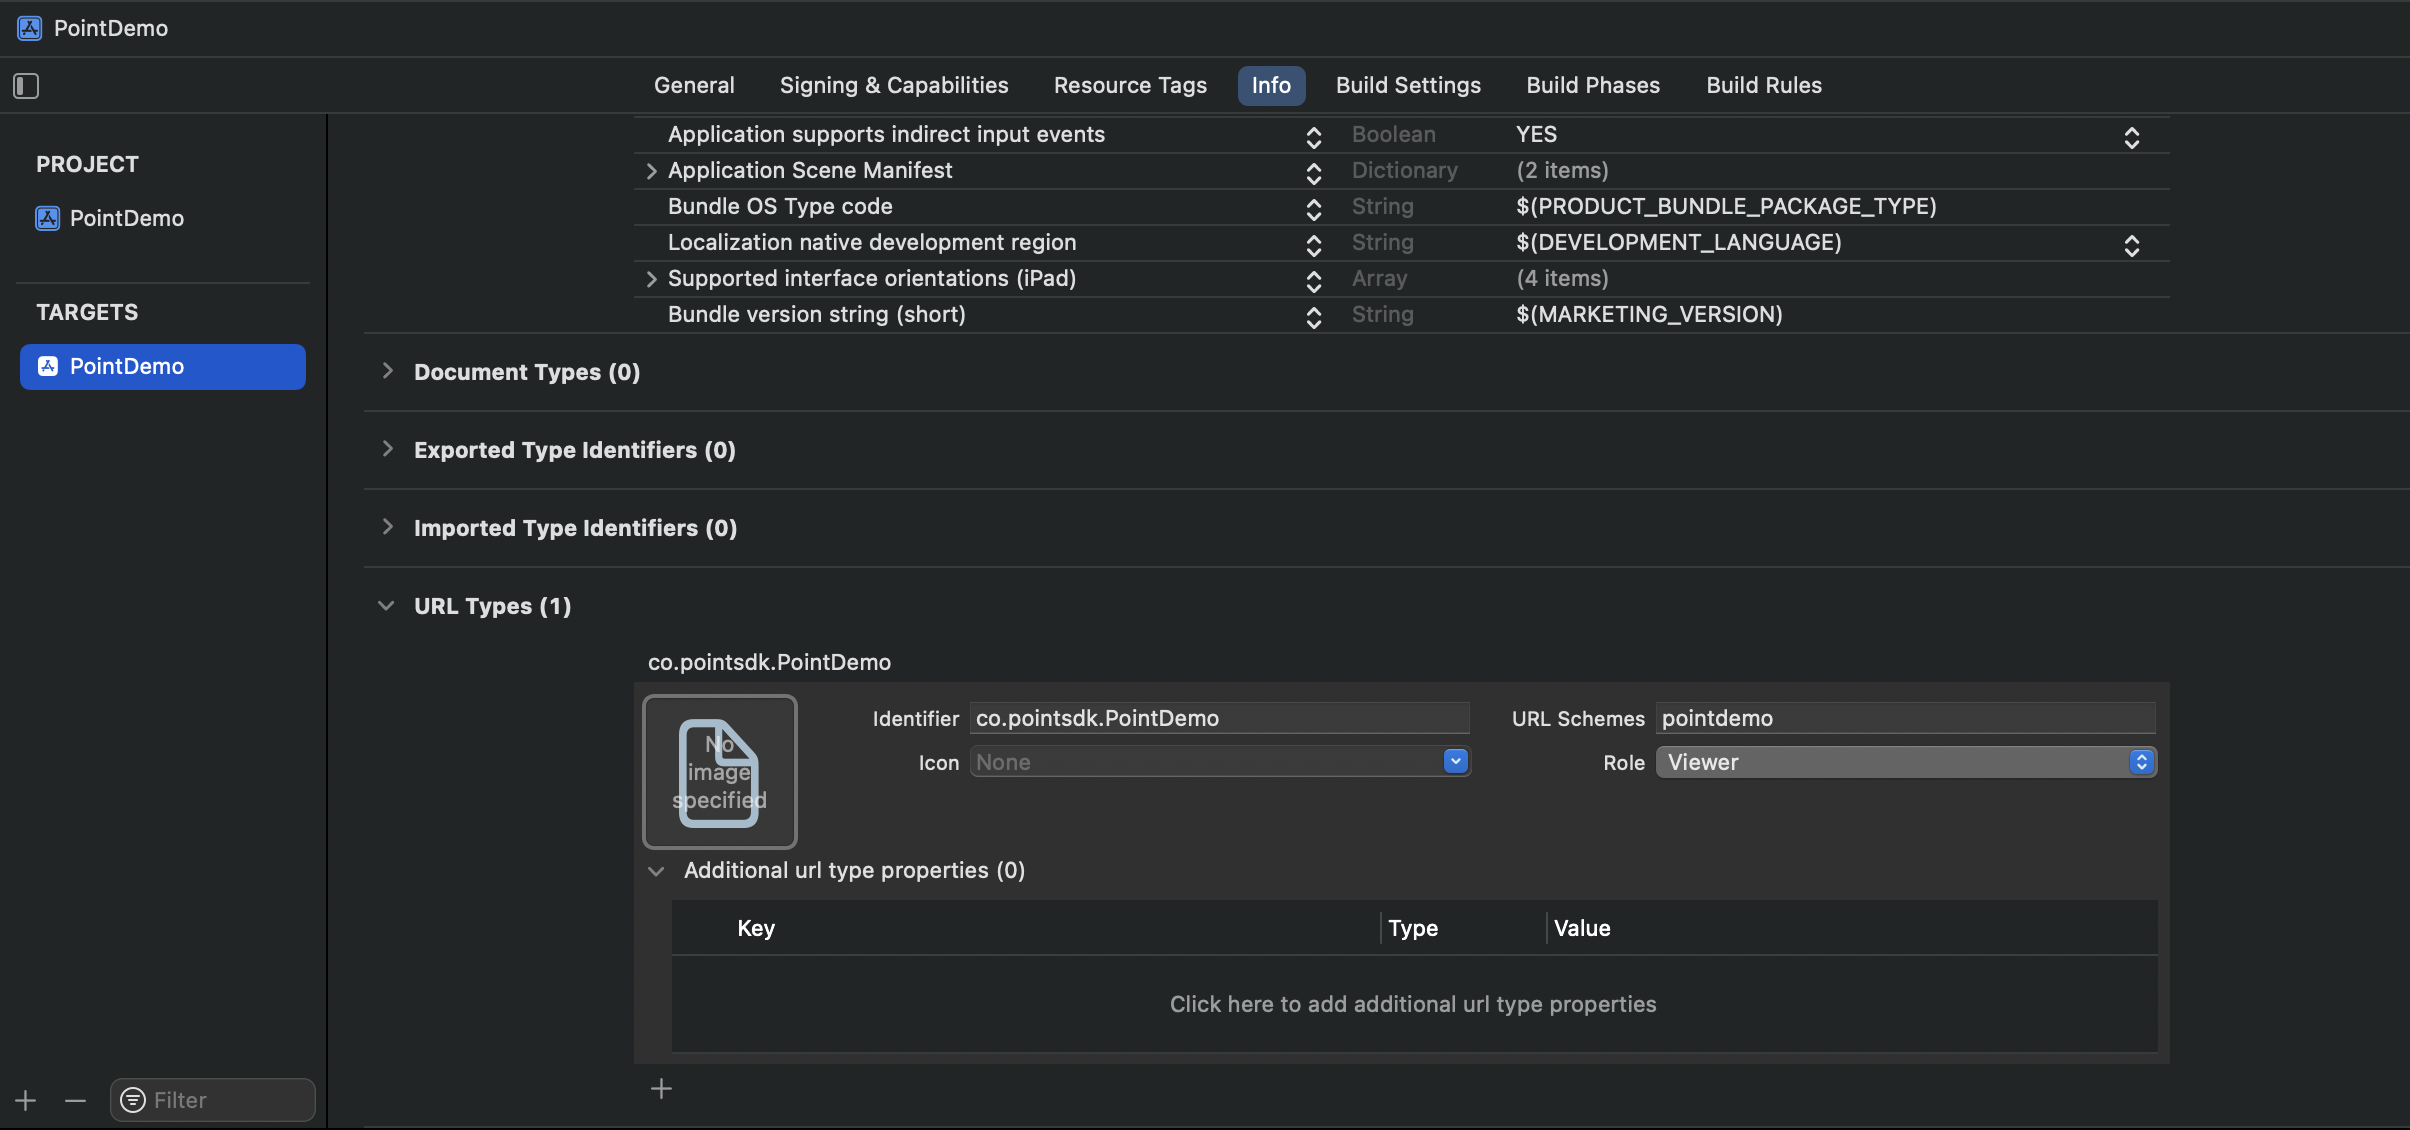
For more information, check the official docs: Defining a Custom URL Scheme for Your App
Authenticating
To display the authentication web page, call FitbitIntegrationManager/authenticate(scopes:callbackURLScheme:).
When you call this function your app will display a browser with the Fitbit authentication web page. If the user successfully authenticates, the browser will be dismissed and the control will be handled back to your app.
💡 The
callbackUrlSchemeparameter is the scheme created in the previous section.
func authenticate() async {
    do {
        guard let fitbitManager = Point.fitbitManager else {
            print("Fitbit client ID was not set when setting up the SDK")
            return
        }
        try await fitbitManager.authenticate(callbackURLScheme: "yourapp")
    } catch {
        print(error)
    }
}
If you wish to select specific Fitbit scopes, use the scopes parameter. All scopes are selected by default. Check Fitbit Official Documentation to know more about scopes.
func authenticate() async {
    do {
        guard let fitbitManager = Point.fitbitManager else {
            print("Fitbit client ID was not set when setting up the SDK")
            return
        }
        try await fitbitManager.authenticate(scopes: [.sleep, .heartrate], callbackURLScheme: "yourapp")
    } catch {
        print(error)
    }
}
💡 The user will be requested to provide authorization for each scope subscription, so data will be collected only if the user provides authorization.
After successful authentication, Point will retroactively retrieve one year of Fitbit data. After this, the subscriptions are created and Point will be notified for each new user data. No further action is necessary for the SDK. Check Health Data Service to know how to have access to Point's generated metrics.
Revoke
You can revoke all Fitbit subscriptions of the user by calling FitbitIntegrationManager/revoke().
func revoke() async {
    do {
        try await Point.fitbitManager?.revoke()
    } catch {
        print(error)
    }
}
After calling this, Point Health Service will stop receiving new data from Fitbit.
Check User Status
You can use FitbitIntegrationManager/getUserAuthenticationStatus() to know what is the current authentication status for your user. If FitbitIntegrationManager/UserIntegrationStatus/active is true, your user has already authenticated and Point is collecting their data. You can also check what types of data are being collected by checking FitbitIntegrationManager/UserIntegrationStatus/scopes.
func getCurrentStatus() async {
    guard let manager = Point.fitbitManager else { return }
    do {
        let status = try await manager.getUserAuthenticationStatus()
        print("Current status is: \(status?.active)")
        print("Authorized scopes are: \(status?.scopes)")
    } catch {
        print(error)
    }
}
Next Steps
Learn more about the Oura integration.